Tutorials
Running Your First Detection Pipeline
A complete walkthrough from raw images to labeled detections in 7 steps.
Prerequisites
- Access to a Tapis-connected HPC system (Pitzer, Expanse, Ascend, or Cardinal)
- A Tapis account with a valid Slurm account to charge
- A directory of images on a Tapis filesystem
- (Optional) A Hugging Face token for gated models such as SAM3 or BioClip
Getting Started
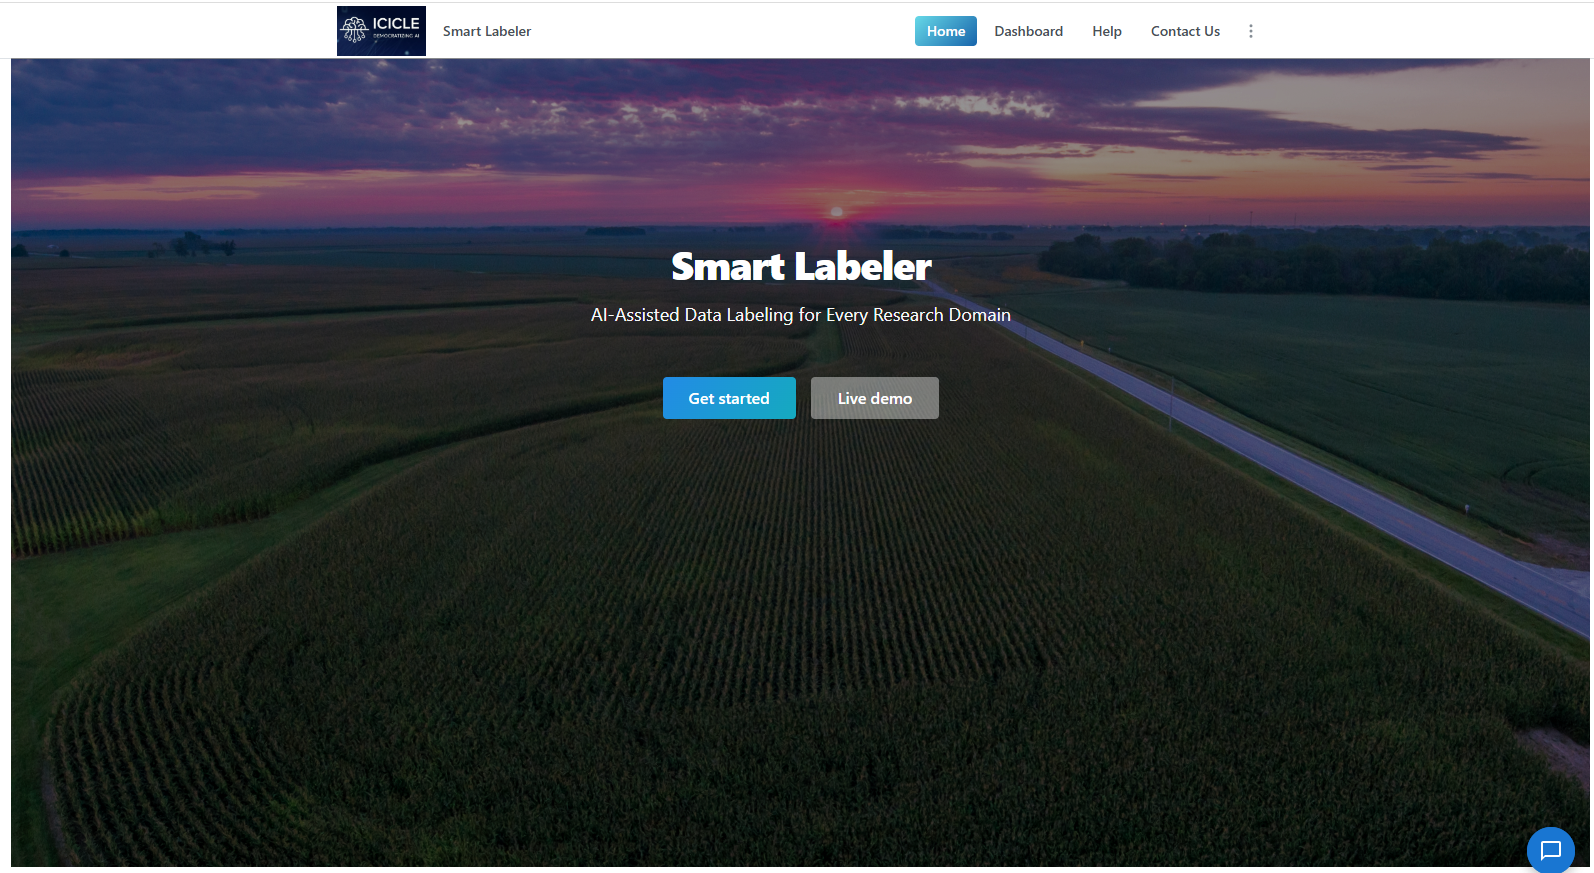
Navigate to the home page and click Get Started or Dashboard.
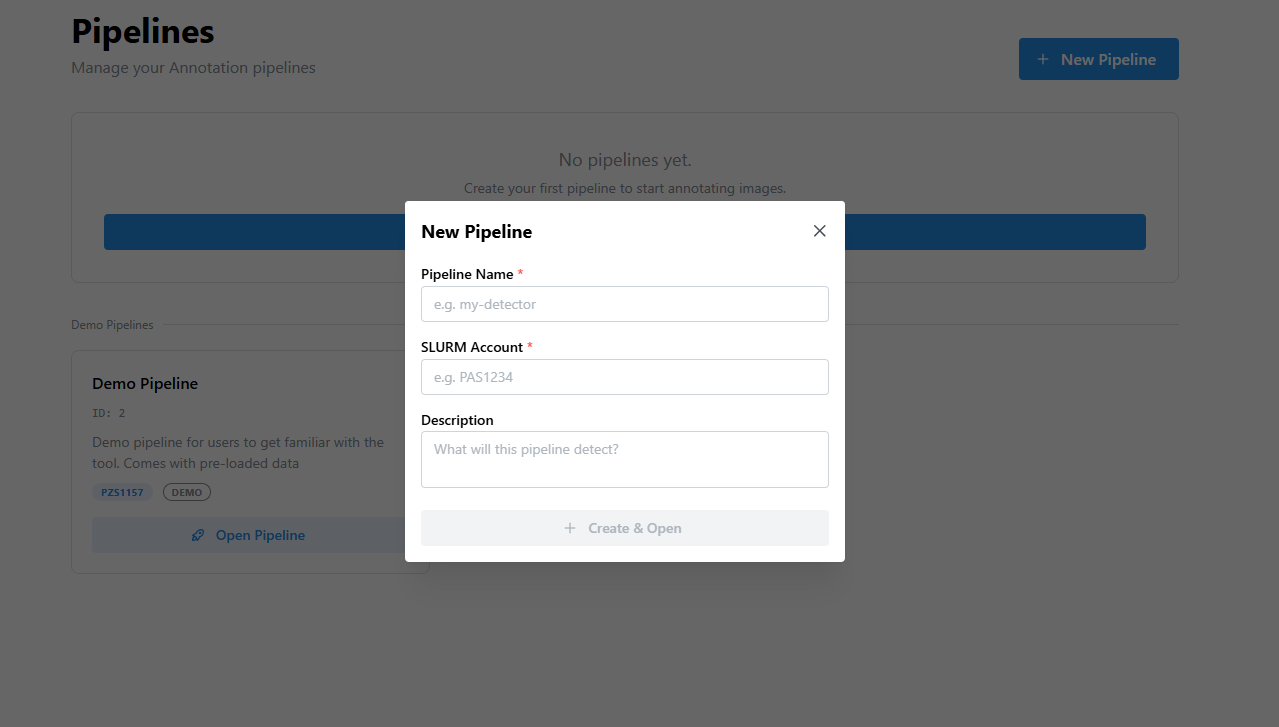
From the dashboard you can create a new pipeline or resume an existing one.

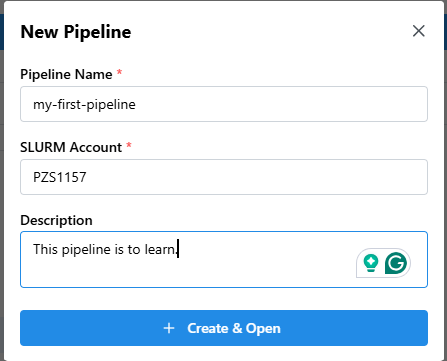
Click Create New Pipeline, enter a pipeline name, select the job type (Object Detection), and provide a Slurm account. Click Create New Job.
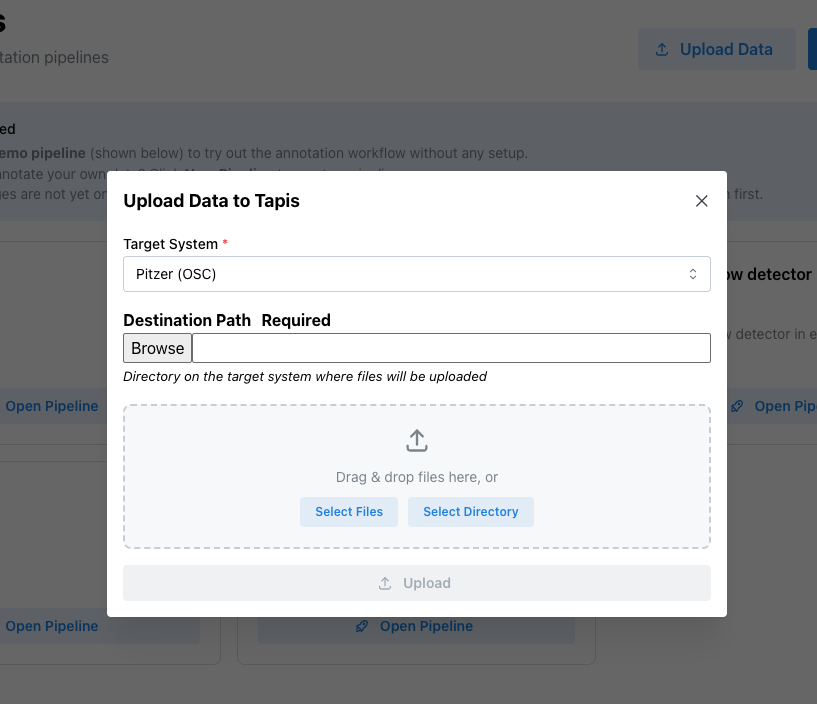
In order to upload data from you system to HPC click on upload button.
Step 1 — Annotate Images
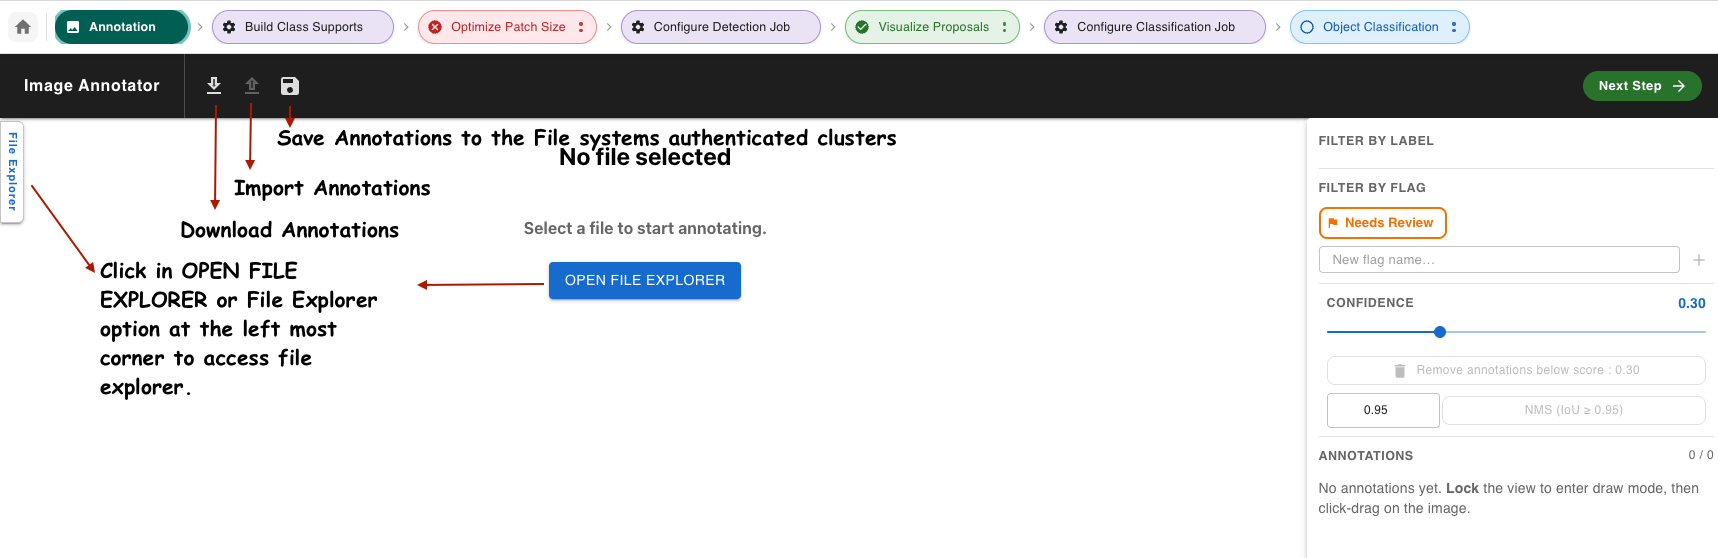
Open Step 1 — Image Annotator from the pipeline navigation bar.
In the File Explorer panel, select a compute system and enter the path to your image directory. Click Get Images.
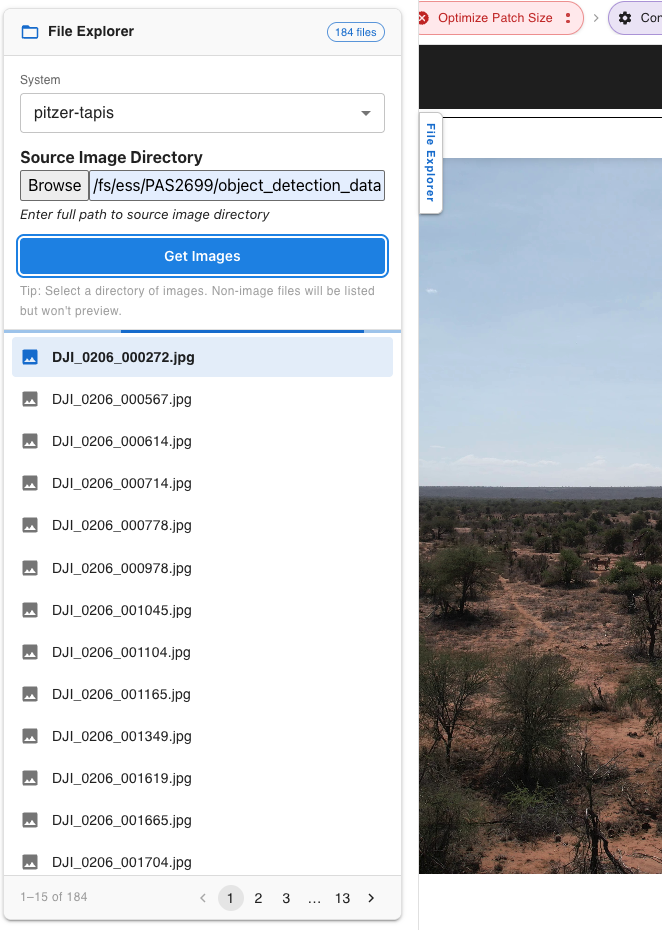
Click any image thumbnail to open it in the canvas. Draw bounding boxes by clicking and dragging on the canvas, then assign a label to each box.

To use SAM3 assisted annotation, select Single Click mode, enter a label, then click an object in the image to auto-generate a box.
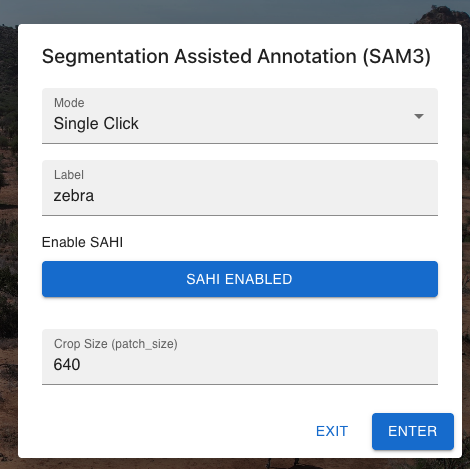
Or use Text Prompt mode to run prediction over the whole image from a comma-separated label list.
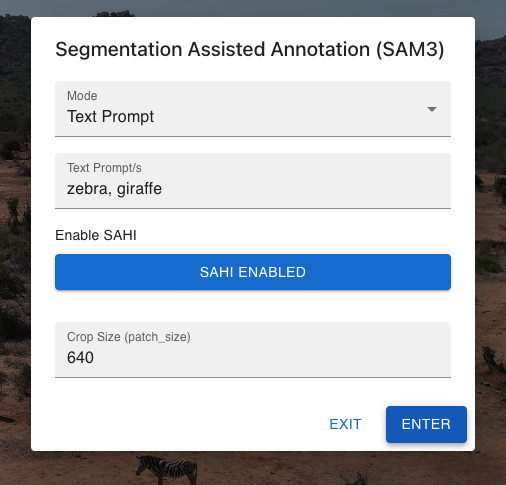
When finished, click Save Annotations and choose a remote Tapis path to store the COCO JSON file.
Step 2 — Generate Class Supports
Open Step 2 — Generate Class Supports.
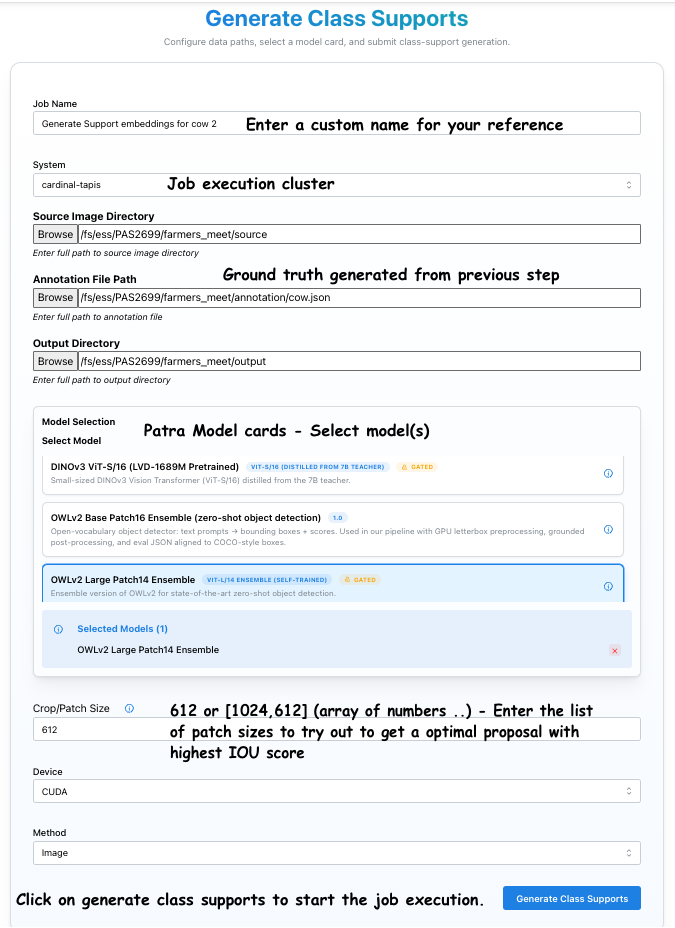
Enter a job name, select Proposer and Embedder models from the Patra catalog, and set crop/patch sizes (e.g. [2048, 1024, 512]). Click Submit and monitor job progress in the pipeline status bar.
Step 3 — Optimize Patch Size
Open Step 3 — Optimize Patch Size once the Step 2 job finishes. Use the File Explorer to navigate your images. Click each result file in the right panel to compare ground-truth vs. predicted boxes for each crop size.
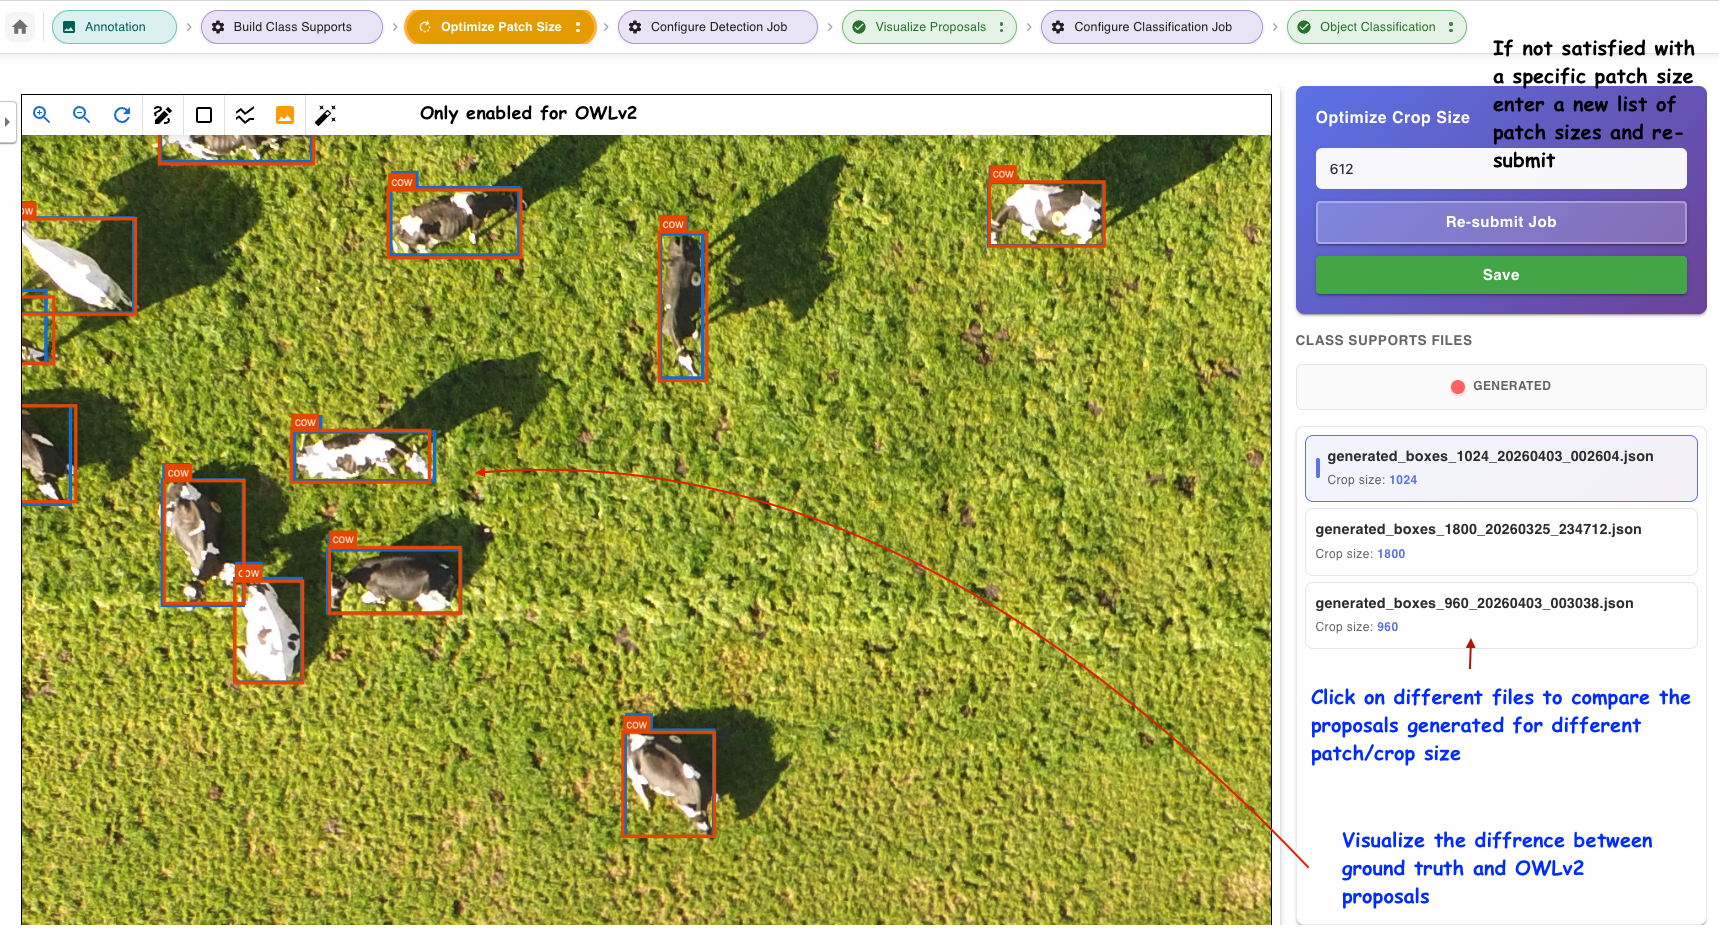
Check the IoU Graph to identify which patch size produces the highest scores.
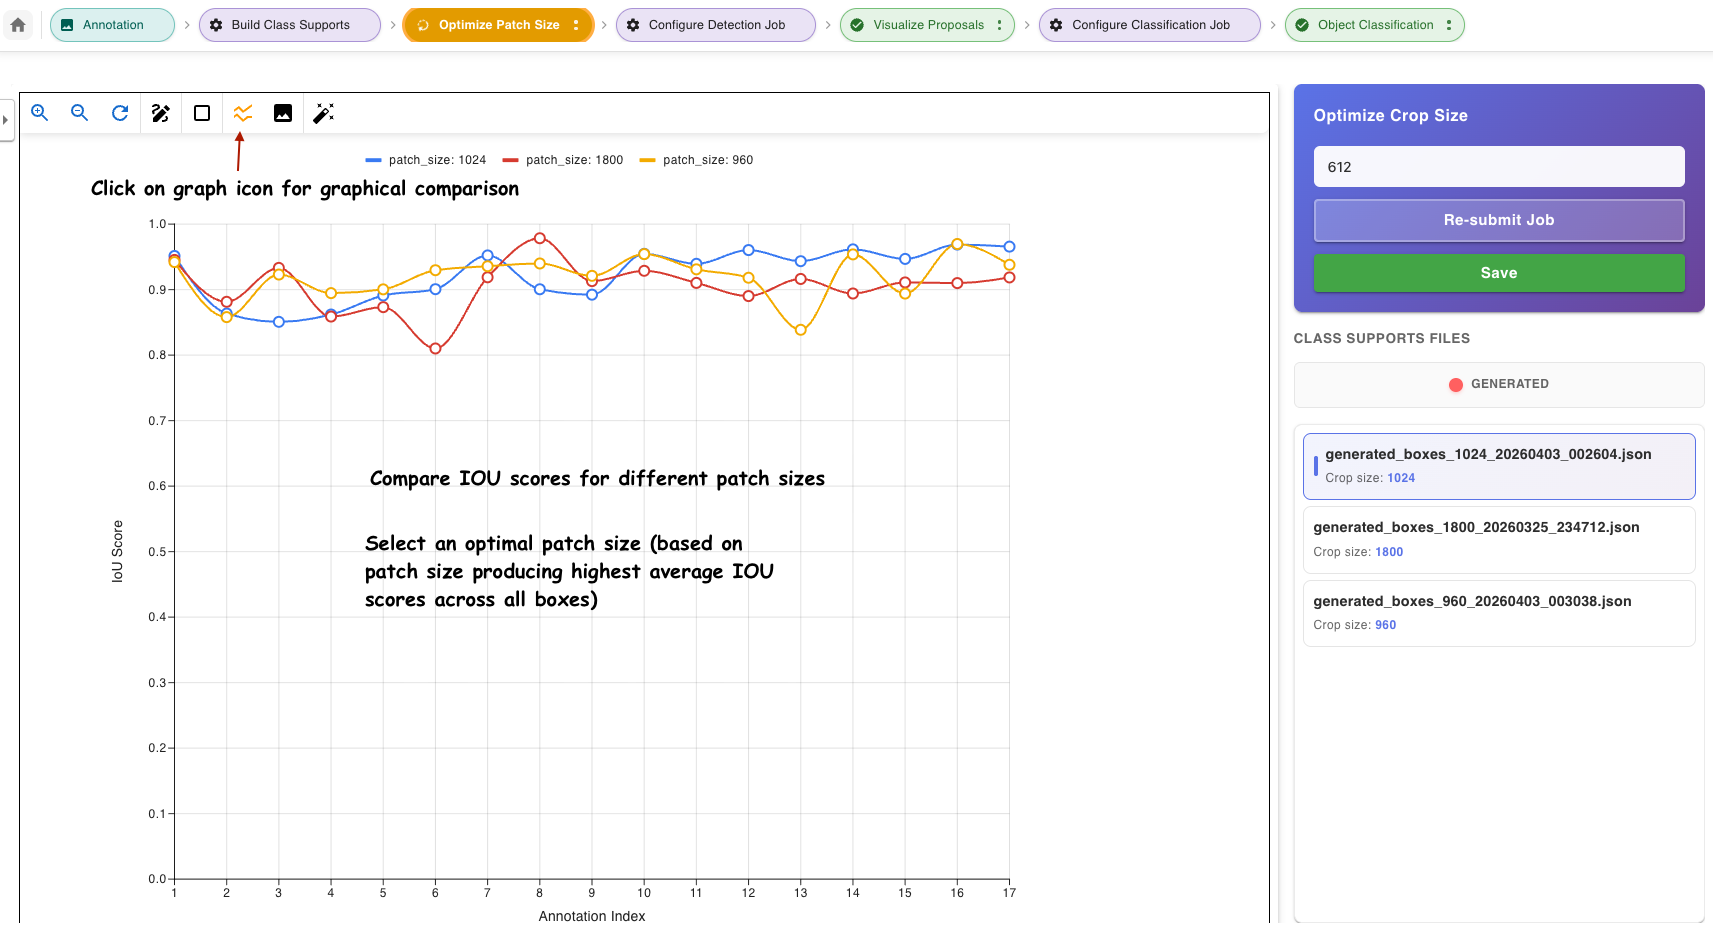
Note the optimal patch size and proceed to the next step.
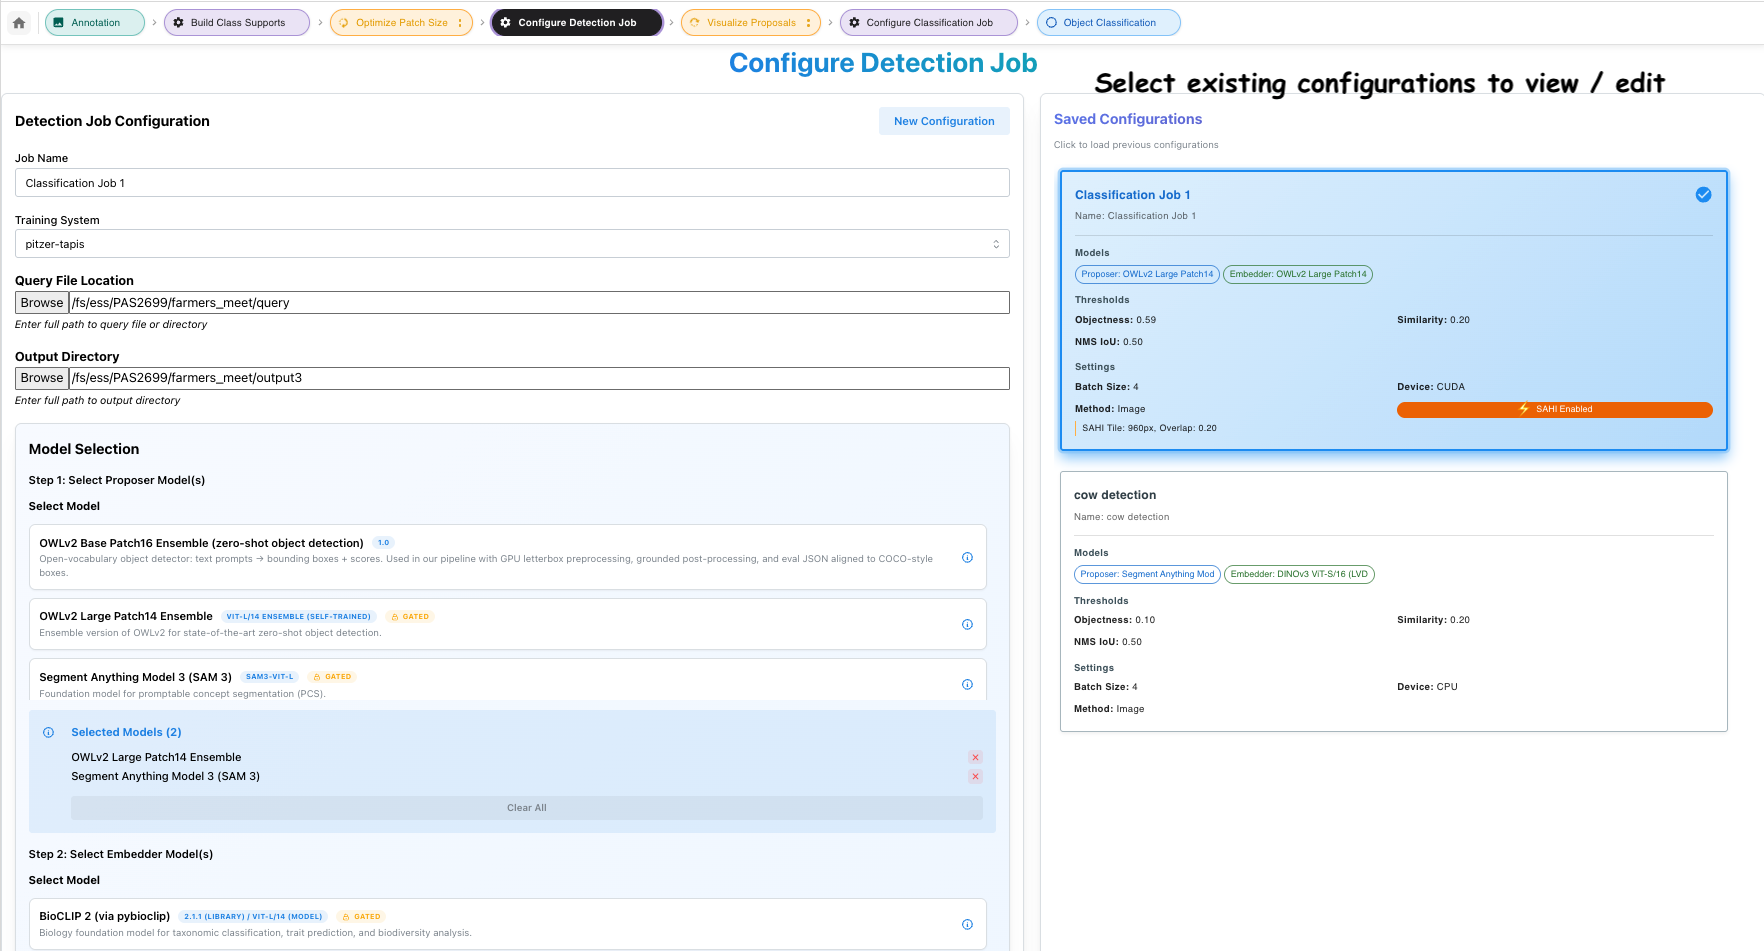
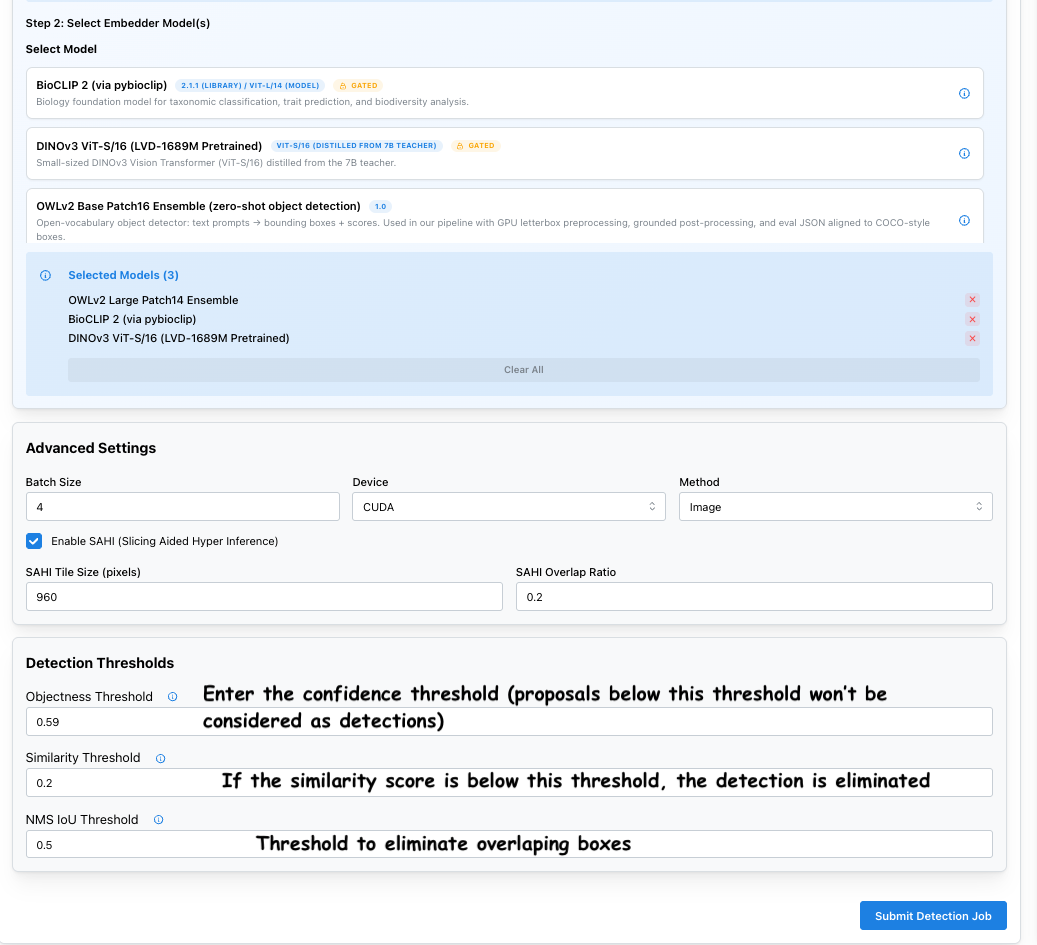
Step 4 — Configure Detection Job
Open Step 4 — Configure Detection Job. Enter a configuration name, provide a query image path or directory, select models and thresholds, and optionally enable SAHI tiling. Click Submit to queue the detection job.
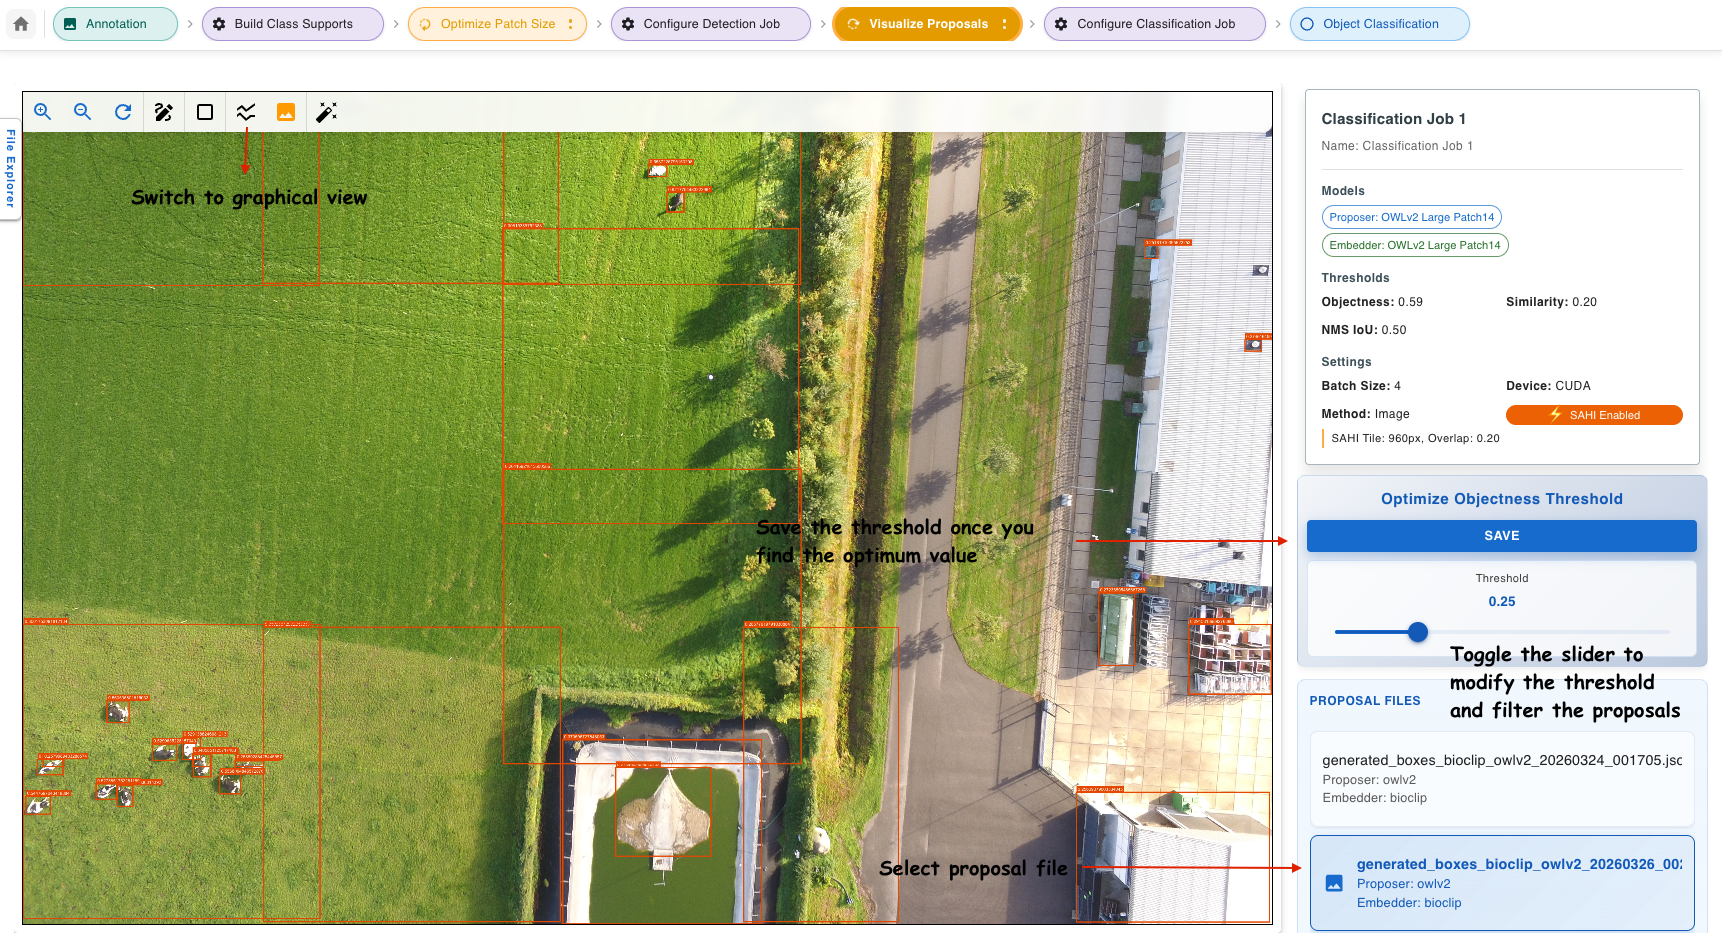
Step 5 — Visualize Proposals
Open Step 5 — Visualize Proposals once the detection job completes. Select a proposal file from the right panel. Drag the objectness threshold slider to filter boxes in real time.
Use the Objectness Score Graph to find a natural cutoff point.
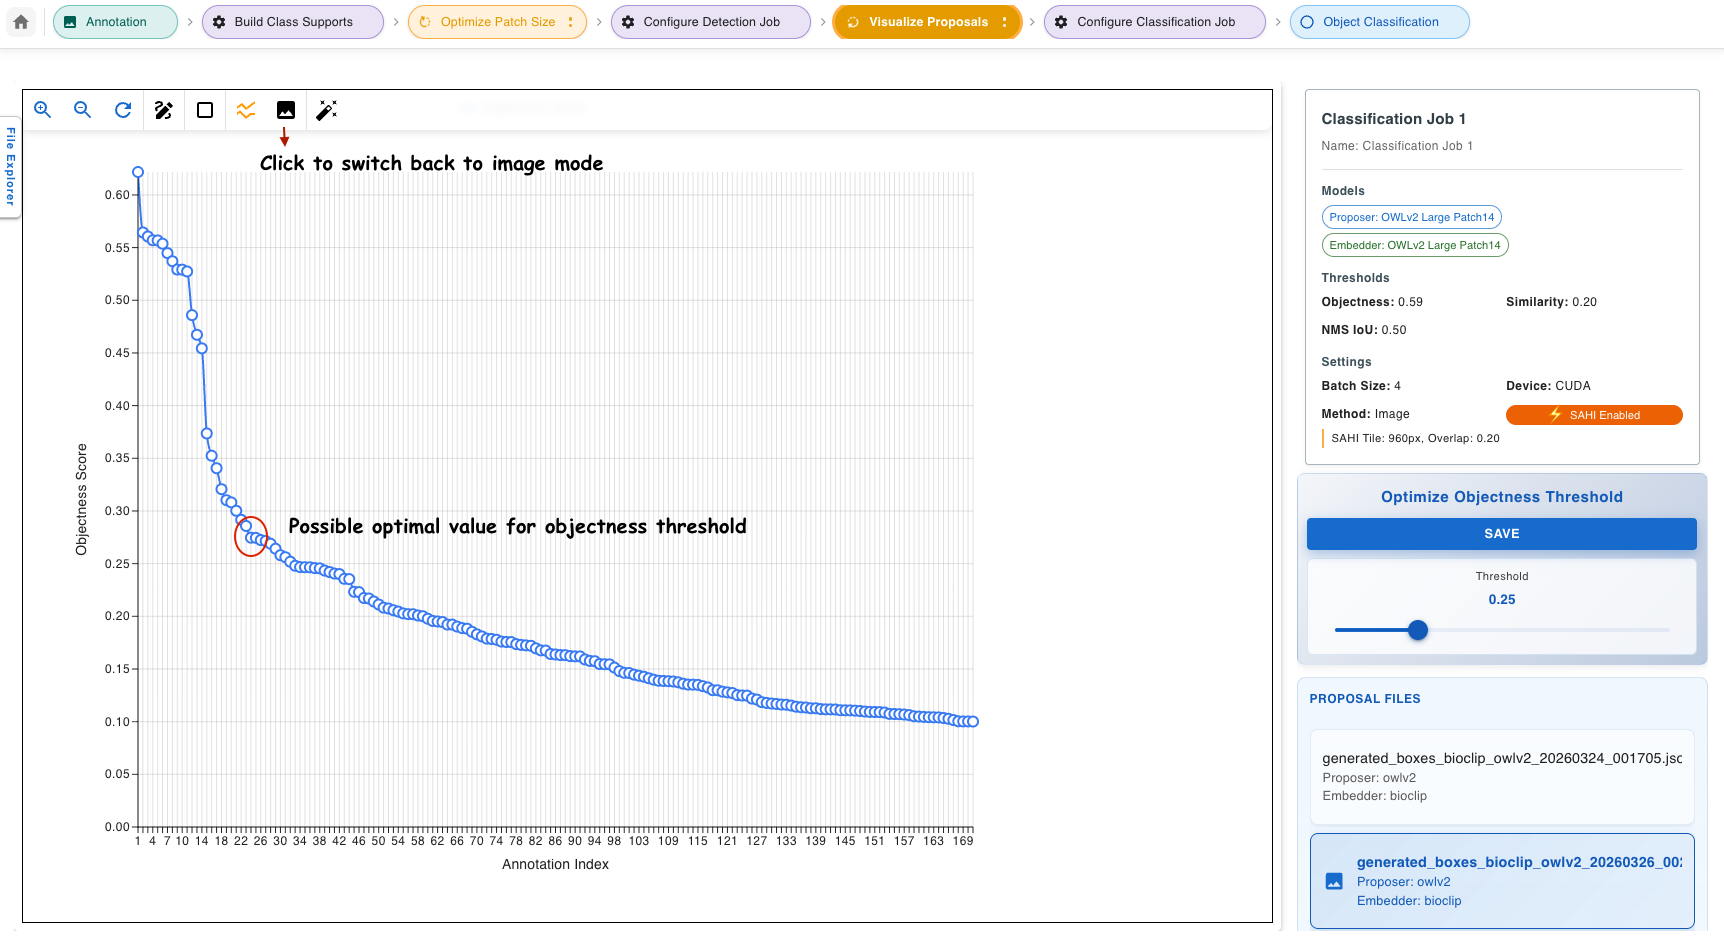
Click Save to store the threshold for use in classification.
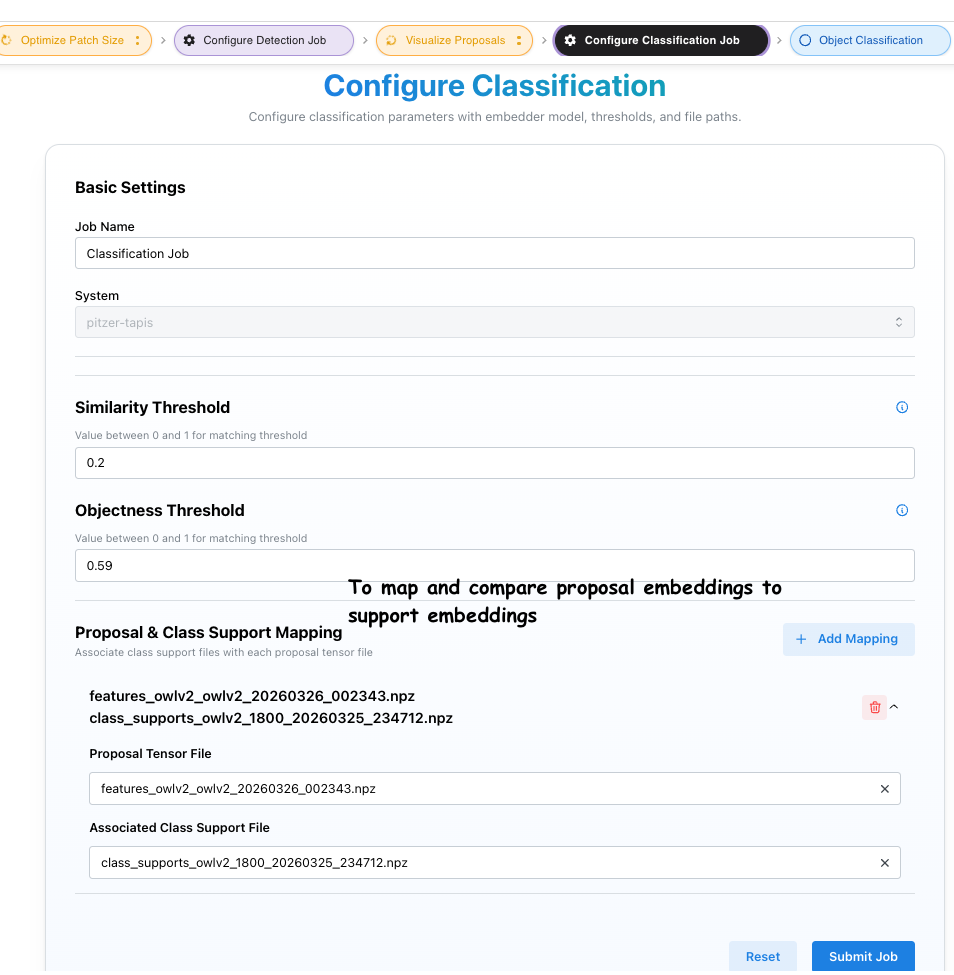
Step 6 — Configure Classification Job
Open Step 6 — Configure Classification Job. Add one or more Proposal → Class Support tensor mappings using the Add Mapping button. Set a similarity threshold and click Submit.
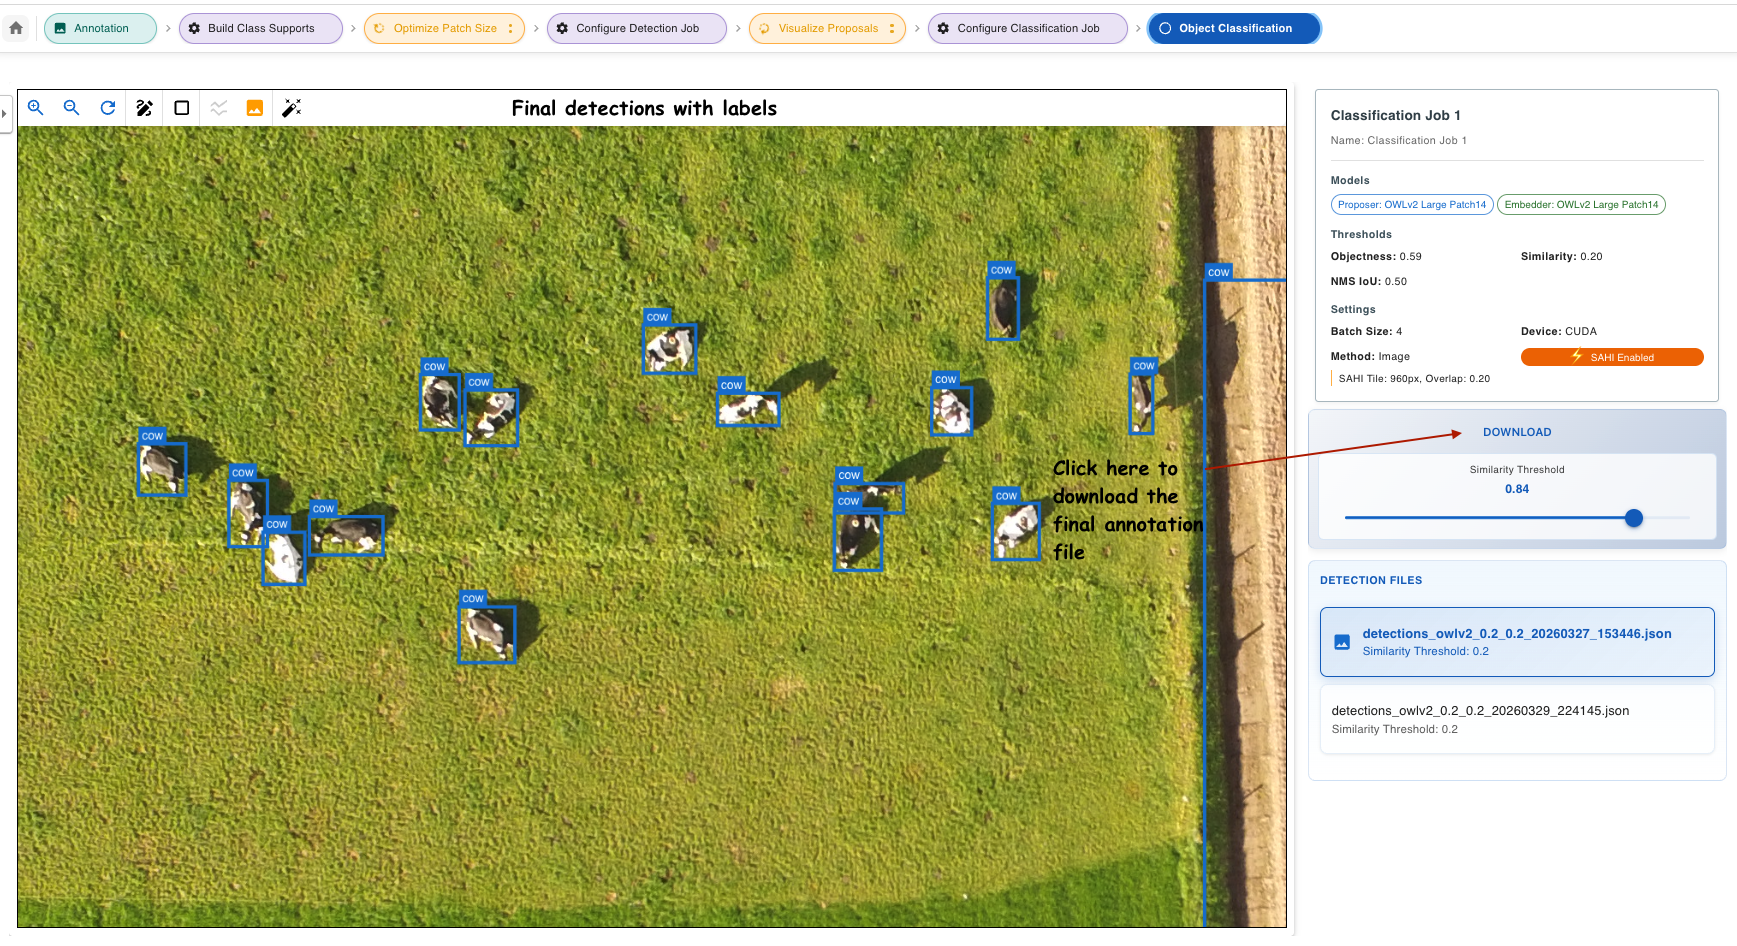
Step 7 — Review Results
Open Step 7 — Object Classification. Select a result file from the right panel and navigate images using the File Explorer. Drag the similarity threshold slider to filter results in real time. Click Download to export as COCO JSON or pipeline-native JSON.